Okay, so that may be a bit sweeping and dramatic--but the last few weeks have certainly been a delicious odyssey. Since my first foray into sourdough baking in December, I've baked four more batches, making incremental progress each time. The wonderful thing is, even when things go wrong, the bread has still tasted great.
My second attempt, a few days after the first, yielded a slightly more browned crust, thanks to a slower, longer rise. The loaves were soft and tasty, but still lacking a tangy sourdough flavor, so I went back to the sourdough blogs. Sourdough Home's "starter primer" in particular was quite helpful, as was Wild Yeast's post about raising a starter.
I learned I had been mistaken in thinking my starter wasn't the problem; a "starter" technically begins as a "culture", and then as it becomes healthy and established, it begins to develop the distinctive sour taste. Mine, only a few days old when I first used it, was far from being a starter--it was still a culture and as such, needed to be fed and tended until it could double itself in a twelve-hour period. Knowing that, I put off more baking to work on getting my starter going.
Rather than going back to the beginning and making an entirely new starter from scratch, I just took what I had out of the refrigerator (which is where the instructions in The Tightwad Gazette said to store it) and started feeding it per the instructions in Sourdough Home's starter primer. In order to keep it in the warm temperature range recommended by the primer, I stored it in the warmest place in my kitchen: on top of the fridge. Finally, at the beginning of this week, my starter was doubling itself every twelve hours, so I felt ready for another try.
I baked attempt #3 on Tuesday morning. At long last, sourdough flavor and a browned crust! I made a batard (oval loaf) and a boule (round loaf), but my dough ball, and later the loaves, developed a hardened "skin" during the rises. So for my fourth attempt, the next day, I baked a single loaf in a loaf pan and experimented with spritzing the towel that covered the dough with water while it rose. Still pretty dry, but getting closer.
Today was my fifth attempt. I spritzed the dough with vegetable oil during the first rise, covered it loosely with plastic wrap, and spritzed it with oil again after shaping it into a loaf and letting it rise a second time. This worked well to prevent the dried skin on the dough, although I think halving the recipe (which I did just for the sake of not having too much bread on hand) didn't make quite enough dough for the size of bread pan I used.
My latest loaf still tastes wonderful, though, and makes lovely sandwiches that my kids gobble up!
Showing posts with label projects. Show all posts
Thursday, January 10, 2013
Monday, November 26, 2012
Christmas is coming...
...in less than a month! I started my Christmas sewing on Saturday, turning some gold-colored brocade from my fabric stash into a tree skirt. In former lifetimes it has been both pillow shams and a valance above our shower. A little Velco, a little gold braid (and a whole lot of calculating and then recalculating the diameter of the circle based on the amount of gold braid I had to go around the circumferance) and voilà! Things old are new again.
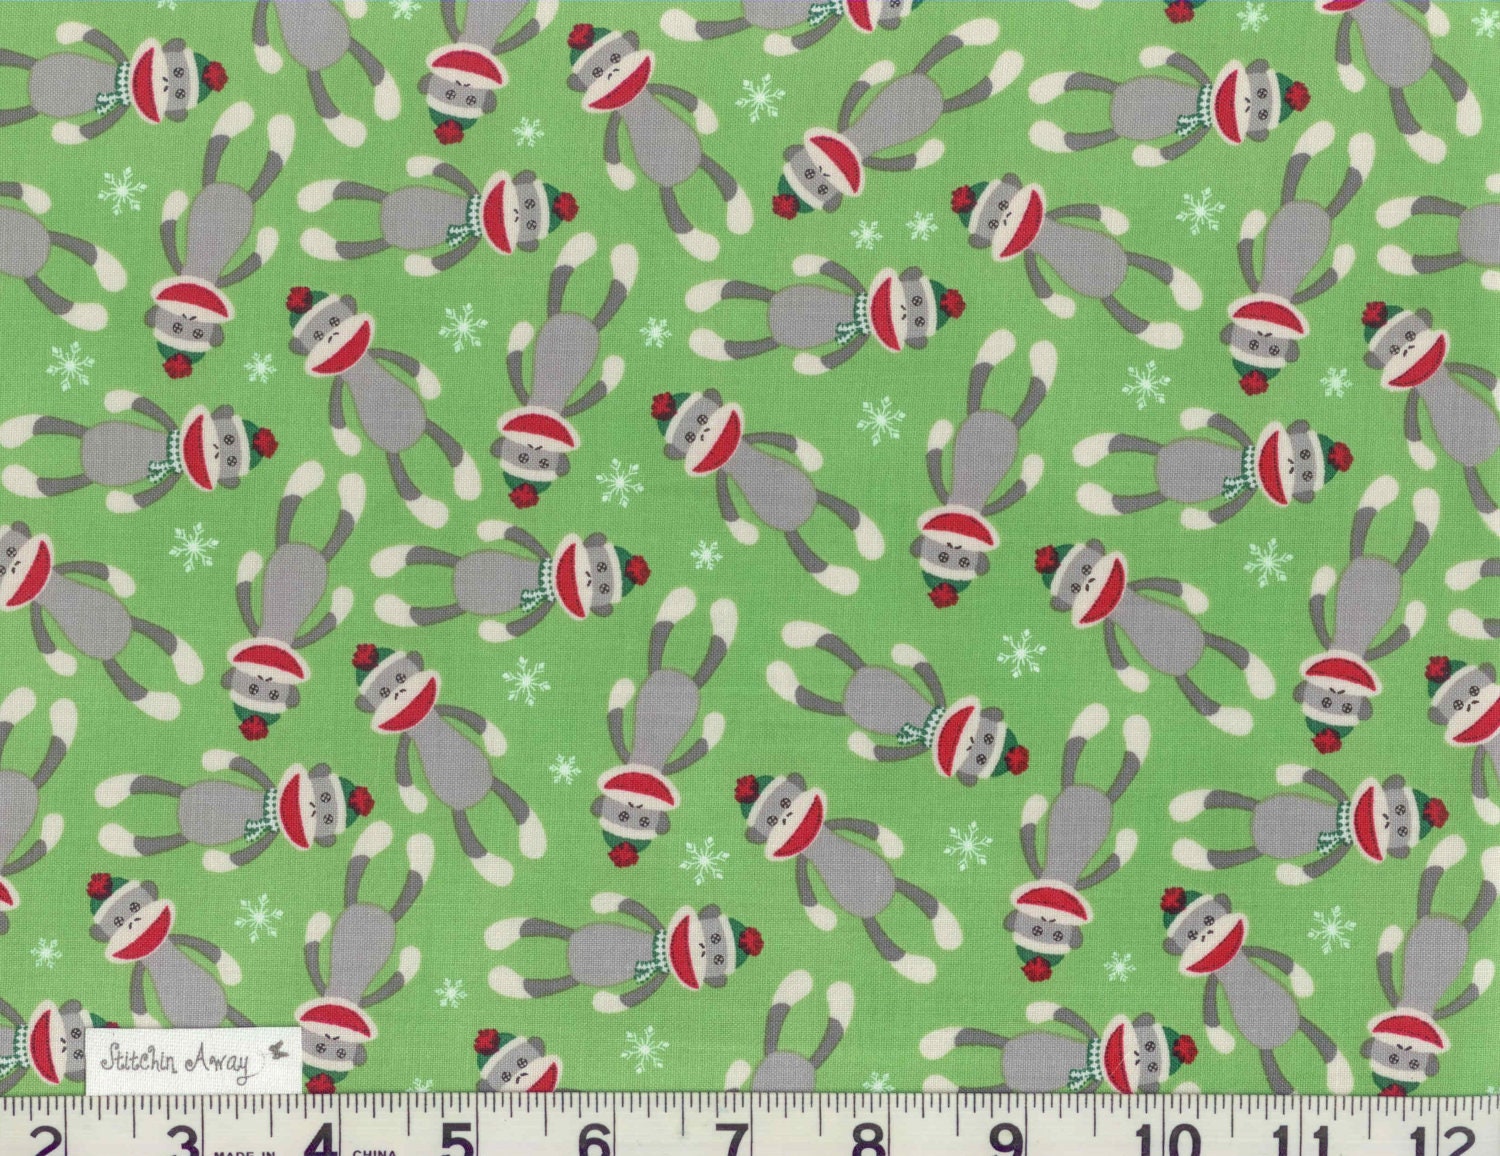
Next up: stockings for me and Jim. I made our original stockings back in 1996 and they're just so... 90s. You know, earth-tone red and green plaids with pine trees and hearts. I wanted something a little more expressive of our personalities, so over the last few months I bought some Simpsons Christmas fabric for Jim and sock monkey Christmas fabric for me.
Today I started planning our yearly advent calendar line-up, inspired by this post at Playful Learning. Our annual favorites will be back, including:
Next up: stockings for me and Jim. I made our original stockings back in 1996 and they're just so... 90s. You know, earth-tone red and green plaids with pine trees and hearts. I wanted something a little more expressive of our personalities, so over the last few months I bought some Simpsons Christmas fabric for Jim and sock monkey Christmas fabric for me.
Today I started planning our yearly advent calendar line-up, inspired by this post at Playful Learning. Our annual favorites will be back, including:
- putting up the tree on December 1st
- reading about the history and significance of Christmas symbols such as the wreath, the candle and the star
- making Christmas cookies
- hanging our stockings
- visiting the local animal shelter with donations for needy critters
- making Christmas cards for teachers
- reading about the history of the winter solstice
- decorating ice cream cone Christmas trees (instead of the usual gingerbread houses)
- creating ornaments for grandparents
- learning about how Las Posadas is celebrated in Mexico and making tamales
Thursday, September 13, 2012
Back in a routine
In the two-and-a-half weeks since I last posted, we:
- started the school year (Jimmy in 4th grade, Audrey in Kindergarten)
- hosted our cousin Aidan for five days
- celebrated Audrey's birthday
- wore cowboy boots to the county fair
- kicked off soccer season
- went on a field trip to Thorp Mill
- stayed overnight with friends near Seattle
- returned to regular cub scout meetings
In between all these goings-on, I've been trying to find a new normal--staying on top of housework by having the kids help, carving out time to exercise and take care of myself, baby-proofing everything now that Joseph is walking (and yes, my kitchen is still gated off while I contemplate the daunting prospect of deep cleaning and locking down everything below three feet high)--all while figuring out the trick of homeschooling two kids at once.
Surprisingly, I've been feeling mostly successful at all of this. We've had the requisite amount of griping about piano practice and math worksheets, but overall, school has been fun and Jimmy's self-direction has allowed me to spend the time with Audrey that she needs. I've made a lot of progress on taming my short temper. My house has been cleaner more consistently than I can ever remember it being before. In the afternoons, I've even had a few hours between helping the kids with their chores and putting Joe down for naps to cross off a few extra projects on my to-do list like cleaning out closets and getting rid of baby gear we no longer need. Just yesterday I made up a triple batch of laundry soap and a batch of dishwasher detergent, too.
Today is bread day.
For a while now I've been wanting to stop purchasing store-bought bread, but I haven't been happy enough with how my own bread turned out, so I've been experimenting and tweaking my recipe and methodology. I got my original recipe for three whole wheat loaves from my mother-in-law, but found that my bread always seemed to turn out too dense and low. Through a lot of trial and error I've discovered a few things:
1. My kitchen is drafty, which means it is usually too cold for the yeast to grow, especially during winter and spring. I can mitigate this by turning on the oven and leaving it slightly open while the yeast is proofing to warm up the room.
2. Using exclusively whole-wheat flour (along with any additions like oats or flax) makes for very dense, heavy bread, which means that it won't rise as high and will be more crumbly. So now I use all-purpose flour for half of the flour content, and sometimes add in a bit of ground flax or oats--but a little goes a long way.
3. Recently I figured out that refined sugar, even in small quantities, aggravates my arthritis, so I've switched to using honey, which makes me hurt less and the bread more moist.
4. Our family eats about four loaves of bread a week, so if I wanted to bake only once a week, I would have to readjust my recipe.
5. My friend Carol, who used to have a bread business, told me that adding some baking powder helps get a bit more rise during baking, so I started doing that, too.
6. My kids love my bread. Both Jimmy and Audrey have said, "Mom, your bread is waaaaay better than bread from the store." The fact that Joe eats more of it than he throws on the floor is his own ringing endorsement.
Chicklegirl's Wheat Bread
5-1/3 cups warm water
1/3 cup honey
5 tablespoons active dry yeast (I buy the bags of Red Star brand at Costco, which cost only slightly more than a few packets purchased at the grocery store)
5 cups all-purpose flour
6-7 cups whole wheat flour
1/4 cup ground flax seeds or rolled oats (optional, exchange for 1/4 cup of the flour)
1/3 cup olive oil
5 teaspoons salt
1/4 cup vinegar
1-1/2 teaspoons baking powder
1-1/2 teaspoons lemon juice
Mix yeast, water and honey together in bowl of stand mixer. Proof for 15 minutes, until bubbly. Add other ingredients and mix together with two or three turns of the bread hook. Let rest for 10 minutes. Knead with bread hook for 10 minutes. Turn dough out of stand mixer bowl into larger metal bowl, then cover with a tea towel or cloth to rise until double (about 30 minutes, depending on if your kitchen is drafty--the warmer, the better and faster the dough will rise). Turn dough out onto lightly floured counter top and divide into four equal parts. Form parts into loaves and place in greased loaf pans. Let loaves rise until they round up above (but not overflow) the rims of the pans. Bake at 350 degrees F for 30-35 minutes. Makes 4 loaves.
Tonight, I'm trying a new recipe for peach jam made with honey.
Thursday, January 19, 2012
Tuesday, July 26, 2011
Keeping busy

Last Thursday I got the top of the baby quilt pieced and pinned to the other layers. Next, I had to figure out what design I wanted to use for quilting. Rather than just the diagonal lines suggested in the pattern, I wanted something more memorable. Jim talked me out of X's and O's (apparently a bit "too girly") but I riffed off that and came up with appropriately masculine X's and stars.
Last Friday I started hand-quilting and have been working at it slow but steady all weekend. I'm almost a third of the way done, and the design is really starting to take shape.
The callouses on my fingertips are coming along nicely, too.
Thursday, July 21, 2011
Baby quilt
Both Jimmy and Audrey have red, white and blue baby quilts. Jimmy's was made by my mom, and I finished Audrey's the week before she was born. So, of course, Joseph needs to have a red, white and blue baby quilt, too.
Did I mention we picked out a name? (with the caveat from Jim that he may still change his mind.)
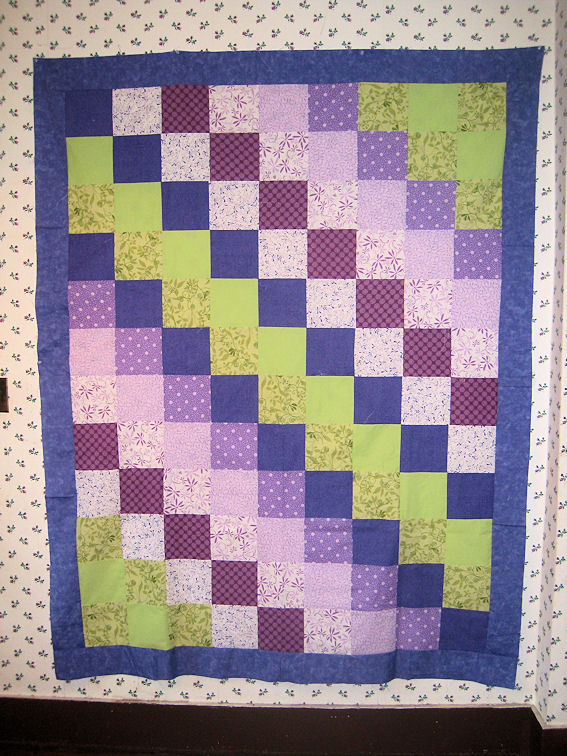
A while back I found a couple of simple, free baby quilt patterns online. I based Audrey's birthday quilt loosely on the "Furrows" pattern, and have been excited to try out the "Sunshine and Shadows". I picked this pattern because it would go together so quickly and be easy to both sew and hand-quilt, but made a few alterations for the color scheme I chose.
I just finished cutting out all the squares this morning, laid them out, and am planning to get most of the top pieced tonight.
Monday, July 18, 2011
Done

What with canning both cherry and raspberry jam this weekend, I was delayed a bit longer finishing Jimmy's quilt--but finally, finally, yesterday afternoon I sewed the last few stitches of the binding.
While he was otherwise occupied, I spirited it up to Jimmy's room and made his bed. A few hours later he went up to get his shoes on before going on a bike ride, and--surprise.
"Mom! My quilt is done! I love it!"
Sunday, July 10, 2011
Getting there

I finally finished piecing Jimmy's quilt top this afternoon! It took a bit longer than I planned (okay, a lot longer, when you consider I started the project back in mid-March), but I got sick shortly after my last post and it's taken me a while to get back into my groove.
I'm hoping (fingers crossed) to have the tying and binding finished by the middle of this week... because I've already got fabric for my next project in the queue ready to go: a baby quilt.
Tuesday, June 21, 2011
Tightwad tuesday: two-fer

As in, two-fer-the-price-of-one. It's been such a long time since I've posted any tightwad tips, I'm throwing in an extra one free of charge.
Some of my favorite tightwad tips are the original ones that are hundreds of years old and sprang from the necessities of every day life. The two I'm trotting out today:
- Re-purpose old clothing into something new
- If you don't know a skill/have what you need, barter with someone who does
The inspiration behind these two tips is a project I've been sewing, off and on, for a couple months now: a birthday quilt for Jimmy. It's made from old pairs of jeans in shades of red, white and blue denim. I usually have a few pairs of ratty, worn-out jeans around just to cut up and make into patches for mending small holes and tears, since kids are so hard on their clothes--but for a couple years now I've been stockpiling old jeans with the plan of turning them into a nice, heavy quilt for Jimmy. It's great to have an abundant supply of sturdy fabric without having to go out and spend any extra cash for it. Though just to add some variety and texture, I bought a couple pairs of striped denim shorts at the local Goodwill and cut those up to mix in with the solid denim.

I got the idea for the pattern from a lovely vintage cotton summer quilt my step-mom Lo gave me, but I decided to double the scale (six-inch squares instead of three-inch squares), as well as making it in a heavier fabric. Instead of hand-quilting it, I'm going to tie it with red cotton yarn. The backing will be a wonderful piece of soft, blue-striped fabric that has a fleecy feel very similar to flannel, which I picked up at Goodwill for a couple dollars.
It's a relatively simple nine-patch design that alternates a solid block with a nine-patch block throughout the quilt. If you're a beginning quilter or (like me) just want something that will go together fast and simple, this is the perfect pattern. If you have a rotary cutter and board, it's very quick to cut out the fabric in strips, and then into squares. Even if you don't know how to sew, this would be a great place to start, as you only have to sew in a straight line: easy-peasy.
Which brings me to tip #2: if you don't know how to sew, barter with someone who does by offering to do something of value to them, such as cooking, baby-sitting or housework. Sewing is one of those homey skills long out of vogue, but now being re-embraced as people realize how liberating it is to be able to custom-make what you want or need, when you want it.

I started this back in mid-March, but was still experiencing a lot of pregnancy-related fatigue and wound up putting the project on the back burner just so I could conserve the small amount of energy I did have to get us through the end of the school year. Now we're done with school, Jimmy is at Cub Scout day camp this week, and I figured it was the perfect time to cross this quilt off my to-do list. I finished cutting out the last of the squares yesterday, so for the next couple days, I'll be busy sewing, tying and binding.
Yes, I'm nesting; can you tell?
Friday, October 29, 2010
Preview of coming attractions


This morning our local library hosted a special Halloween story time, so Jimmy and Audrey had a dress rehearsal with their costumes. Other than a bit of screaming and yelling from Audrey about having her snarly hair pulled back into a ponytail, and the need for her to wear tights in the brisk autumn air, the operation was a resounding success. It was great to see that the costumes I've been working on all week fit well while being roomy enough to accommodate all the requisite Halloween capering.
By tomorrow evening, I'll have finished sewing my costume and Jim's, and our whole ensemble will be ready to debut at the annual trunk-or-treat...
Monday, August 16, 2010
Quilt top done
Friday, July 30, 2010
Think tink

If Audrey had a kindred spirit, it would be Tinkerbell. She's got the same feisty, spunky, creative, slightly vindictive vibe going that I came to know and love watching Tink in "Peter Pan" when I was a kid. Given their similarities, it makes perfect sense to me that during the past six months, Audrey's affinity for all things Tink has reached full-blown infanity.
I've got a basket of Tink trinkets on the bathroom counter, which we use as potty training rewards for Audrey. She's got three different shirts with Tinkerbell, two pairs of Tink pajamas, not to mention books, movies and, well, you get the idea.
A couple weeks back I was cruising clearance racks at the local box store and came across a set of Tinkerbell bedsheets marked half off the clearance price of $24.99. They were for a full bed, but I knew I could cut them down to twin-size, re-sew them, and have some extra fabric left. I combed through the racks, found another set, and got them both, along with a king-size fitted sheet in a coordinating shade of pale lime green (also half-off the clearance price). I figured I could use as the lime green sheet as the backing for a quilt and the extra fabric from the twin sheets to piece a patchwork top.
When I got the sheets home and washed them, I discovered that the fabric of the Tink sheets was pretty flimsy and I wanted to make Audrey a sturdy quilt that could handle all the abuse she would undoubtedly put it through, as well as the requisite laundering. So I made a trip to JoAnn in Yakima and got several yards of calico fabric in shades of purple, magenta and green to match the sheets. I also picked up some lime-green cotton yarn to tie the quilt and some rick-rack to trim curtains and a bed skirt, which I'll make with the left-over fabric from cutting down the sheets.
Over the past few days, I've finished cutting the sheets down and re-sewing them, and just yesterday I finished cutting all the squares for the quilt top. Today's portion of the project will be cutting down the lime-green sheet to the right size for the quilt back, which I'll try and fit in somewhere between the four loads of laundry I need to do today.
Audrey is vaguely aware that I've got the sheets and all the other fabric in my room, but has no idea that her own bedroom is getting a makeover for her third birthday... mwah-ha-ha-ha!
Labels:
Audrey,
projects,
quilting,
sewing,
Tinkerbell
Thursday, May 06, 2010
A break from poetry
After poetry O.D. in April, it's a blessed relief to turn to something else that satisfies me creatively. So I picked up a project that's been languishing in my sewing room: the anniversary quilt. I've been working at it off and on since last summer (mostly off during the school year), but after a nice session last night, I completed the first two rows of squares in the middle section. It's coming along beautifully, don't you think?
Thursday, July 09, 2009
Anniversary quilt

Ever since I made my first quilt right before Audrey was born, I've been wanting to do a bigger one for our bed. Making a quilt to commemorate our wedding anniversary seemed appropriate, and the sixteenth anniversary was a logical choice, since a square quilt will nicely cover our king-size bed, and a completion goal of May 2011 would give me plenty of time for the ambitious tasks of piecing a large quilt by machine and then quilting it by hand.
Back at the end of December, I started sketching. My color palettes (warm tones of orange and yellow, and cool tones of blue and purple) were inspired by some of my favorite flowers: lilacs, hyacinths, hydrangeas, irises, poppies and marigolds. After repeated rearranging and several designs I scrapped completely, I came up with the sketch above.
It's the same arrangement of pieces as the squares in Audrey's quilt, but the colors are grouped to create a completely different design, and the sashing and borders are also different.
The middle sixteen squares are surrounded by a modified "piano key" border, which will be made from 1" x 4" strips of fabric from the same palette sewn together but in random order.
Outside of that is an 8" border I had originally intended to be contrast fabric (a fabric that picked up all the colors from both my palettes), but after some browsing online, I realized it was going to be virtually impossible to find a fabric with all those colors (or even most of them) together. So I looked in some art books and online at Aztec and Mayan textiles and stonework, and came up with a sort of "Aztec key" design that I could plot out in 1" squares of fabric for a mosaic effect that would accomplish the same purpose as the contrast fabric.
On the very outside, I added another 4" piano key border to bring the quilt's dimensions to 96 square inches, which should cover my bed nicely.
For the past six months I've been collecting fabrics here and there, and just this week I got my final piece. Now the fun starts!

Thursday, July 02, 2009
Cheap cherries, part 2
I've mentioned before what an Alton Brown fanboy Jim is. A couple years ago he saw the "Whithering Bites" episode of Good Eats and ever since, he's been dying to try out Alton's improvised dehydrator made from a box fan, bungee cords, and furnace filters. I know—furnace filters?
Our recent windfall of cherries provided the perfect opportunity for Jim to finally make the dehydrator. Right before lunch we created a little assembly line with Jimmy pitting, me slicing, and Jim arranging the cherries in the filters. We prepped a batch of about three or four pounds of cherries, two 20" x 20" filters full. It takes around 48 hours for the fruit to dry out, which means it'll be a warm night in our bedroom without the box fan... but it should be worth it!
Sunday, September 14, 2008
Summer in a jar
Every year at the beginning of September, my mother-in-law heads to her favorite orchard in Wenatchee to buy peaches. She grew up there and has known the owner for decades. His peaches are always lovely: firm but tender, unblemished, and the flavor is... well, amazing.Usually Jim and I have her pick up a 30-pound box for us, which will yield about 18 quarts of canned peaches. Last year I was still recouping from Audrey's birth so I didn't can any peaches, but this year we ordered two boxes.
I used to borrowed my mom's kettle whenever I was canning, but about five years ago I invested in a nice big one of my own that can process nine quarts at a time. Jim and I spent the last two evenings in the kitchen with our oscillating fan cranked up to high and the back door open to let out some of the steam emitted from the kettle.
For me canning is always about bonding with family and sharing skills. I learned how to can from my mom, who put away fruit and vegetables every year when I was little. My dad taught me the nifty trick of using a table knife to slide the fruit halves through the neck of each jar so that they stay round side up and form orderly nested stacks. Jim learned about canning from his mom, and always pitches in. This year Jimmy was old enough to start helping, and was very proud about learning how to cut the peaches in half and then peel off the skin. The fruit will be that much sweeter when we eat it because we worked together.
I woke up sore and stiff this morning, and it was only with much creaking that I managed to extract myself from bed. But how wonderful to come down into the kitchen for breakfast and see the neat rows gleaming in the early morning light, like so many jars of bottled sunshine.
Wednesday, September 03, 2008
Hodgepodge

Not to be confused with Mod Podge, because hodgepodge refers to a motley assortment of ideas or things, whereas Mod Podge is an abbreviation for the "Modern Decoupage" craft glue invented by Jan Whetstone in the 1960s.
I've been looking back at my blog and realizing it looks rather like I fell off the planet (other than writing a dumb post about J.Lo), and honestly I've felt that way lately. The last month has been a blur: sewing a baby quilt, taking dinner in to a friend who's a new mom, sewing a blouse, going to my 20 year reunion, teaching five pre-teen girls to make freezer jam, getting really sick during the same week Audrey cut four molars, writing an amazing poem, sewing a green and white polka-dot baby dress to enter in the the county fair, taking a mini-family-vacay to the Pacific Science Center, riding the ferris wheel at the fair, Audrey's first birthday, cleaning house to get ready for out-of-town company and a birthday party, baking two batches of cupcakes (because the first ones all collapsed flat right out of the oven) and finally, yesterday, Jimmy's first day of kindergarten.
Did I mention we're homeschooling? And Jimmy has his first soccer practice in less than an hour? And Audrey has not had (and probably at this point will not have) an afternoon nap? And even though according to the calendar we still have 18 days of summer, it's already fall here in Ellensburg but that's okay because fall is my favorite season? And yesterday I found out Jimmy has been peeing in the bathtub because he's afraid of the noise the toilet makes when it flushes? And I'm having a really excellent hair day?
It's all good. It's a hodge-podge and it's mine and I love life.
Wednesday, July 02, 2008
Sally bibs: part 2
My house has been languishing in disarray since I got over my nasty cold, and I finally jolted myself into the necessity of cleaning it by inviting friends over for dinner. Sad but true, the thought of company is what always gets me motivated to deal with dirt and clutter. But I'm finally learning to go with what works for me, so I foresee a lot of dinner parties in my future. Probably for the rest of my natural life.
Now that my dining room table is all cleared off, I had room to spread out my unfinished Sally bib project. In part 1, I prepped all the materials, and now it's time to fire up ole Gertie and get down to sewing.
Sewing and Finishing
Step 1: To make a strip of seam binding long enough to go around the outside of the bib, you will need to take two shorter strips and sew them together. Find two strips with slanted edges that fit together. Then line them up, right sides together, as shown above. Note how the points are not matched up but instead overlap and extend about a half inch. This is so that when you sew them together with a 1/2" allowance, the seam will lie exactly where the edges intersect.
Lay the pinned sections of binding on the throat plate of the sewing machine and line up the needle in the point of the "V" where the sections intersect. Set the sewing machine to about seven or eight stitches per inch (this amount of stitches per inch is referred to as "basting"). Baste in a straight line to the point of the inverted "V" on the opposite edge of the binding.
After the sections are basted together, clip the seam allowance down to 1/8", then fold the seam binding back into its creases and press the area where it was joined.
Step 2: Pin the seam binding (wrong side out) to the outside edge of the bib except for the curve around the neck hole. Gently stretch the binding to curve around the curved edges of the bib. Trim the ends of the binding so they are flush with the edges of the neck hole.
Using the first ironed crease in from the edge as a guide (approximately 1/2" seam allowance), baste the seam binding to the bib.
Now, fold the seam binding over the raw edge of the bib and on the unsewn side, tuck the raw edge of the binding under along the fold and match up the edge with the stitches of the seam where the binding was sewn to the bib. Pin in place, stretching to ease the binding around curved edges.
Stitch the binding down as close to the edge as possible, about 1/16" to 1/8".
Step 3: Pin binding to the neck hole of the bib, leaving 9"-long tails at the end on each side, as shown above. Depending on how long your binding is, you may have to sew two more sections together, as shown above in Step 1.
Trim off the ends of the tails so they are square.
Laying open the middle crease in the seam binding, fold over a small allowance (about 1/4"), as shown above on the right. Then pin shut, as shown on the left.
Position the needle in the middle of the tail section, about 1/8" from the edge, as shown above. Reverse stitch to the top (folded) edge. Shift to forward stitching and baste to about 1/8" from the bottom (open) edge.
Making sure that the needle is in the downward position, completely piercing the fabric, lift the presser foot, and rotate the fabric 45 degrees, so that the bottom edge is now lined up to be sewn closed.
Baste the bottom edged closed, and continue basting along the edge of the binding where it is pinned to the bib, approximately 1/8" seam allowance. At the end of the other tail, reverse stitch to reinforce the edge.
Voilà! a finished Sally bib.

Now that my dining room table is all cleared off, I had room to spread out my unfinished Sally bib project. In part 1, I prepped all the materials, and now it's time to fire up ole Gertie and get down to sewing.
Sewing and Finishing
Step 1: To make a strip of seam binding long enough to go around the outside of the bib, you will need to take two shorter strips and sew them together. Find two strips with slanted edges that fit together. Then line them up, right sides together, as shown above. Note how the points are not matched up but instead overlap and extend about a half inch. This is so that when you sew them together with a 1/2" allowance, the seam will lie exactly where the edges intersect.
Lay the pinned sections of binding on the throat plate of the sewing machine and line up the needle in the point of the "V" where the sections intersect. Set the sewing machine to about seven or eight stitches per inch (this amount of stitches per inch is referred to as "basting"). Baste in a straight line to the point of the inverted "V" on the opposite edge of the binding.
After the sections are basted together, clip the seam allowance down to 1/8", then fold the seam binding back into its creases and press the area where it was joined.
Step 2: Pin the seam binding (wrong side out) to the outside edge of the bib except for the curve around the neck hole. Gently stretch the binding to curve around the curved edges of the bib. Trim the ends of the binding so they are flush with the edges of the neck hole.
Using the first ironed crease in from the edge as a guide (approximately 1/2" seam allowance), baste the seam binding to the bib.
Now, fold the seam binding over the raw edge of the bib and on the unsewn side, tuck the raw edge of the binding under along the fold and match up the edge with the stitches of the seam where the binding was sewn to the bib. Pin in place, stretching to ease the binding around curved edges.
Stitch the binding down as close to the edge as possible, about 1/16" to 1/8".
Step 3: Pin binding to the neck hole of the bib, leaving 9"-long tails at the end on each side, as shown above. Depending on how long your binding is, you may have to sew two more sections together, as shown above in Step 1.
Trim off the ends of the tails so they are square.
Laying open the middle crease in the seam binding, fold over a small allowance (about 1/4"), as shown above on the right. Then pin shut, as shown on the left.
Position the needle in the middle of the tail section, about 1/8" from the edge, as shown above. Reverse stitch to the top (folded) edge. Shift to forward stitching and baste to about 1/8" from the bottom (open) edge.
Making sure that the needle is in the downward position, completely piercing the fabric, lift the presser foot, and rotate the fabric 45 degrees, so that the bottom edge is now lined up to be sewn closed.
Baste the bottom edged closed, and continue basting along the edge of the binding where it is pinned to the bib, approximately 1/8" seam allowance. At the end of the other tail, reverse stitch to reinforce the edge.
Voilà! a finished Sally bib.
And a happy baby, ready to dig into dinner!
Update: The reason this post is dated Wednesday the second but appeared on Monday the seventh is I was having issues with Blogger downloading my pictures sideways. Finally figured it out this morning (whew!)
Wednesday, June 11, 2008
Sally bibs: part 1
Anyone who's had a baby learning to eat solid foods or a toddler mastering the finer points of using a fork and spoon will know what I mean when I say a good bib can be the MVP of your child's wardrobe. Good bib coverage means less mess, less clean up, less laundry, less work for mom.
Back when Jimmy was born my friend Sally gave me a set of three marvelous homemade bibs. She was famous among the new moms at our church for her bibs. They were always bright colored terry cloth with complementary seam binding in fun, matching prints. Jimmy's three bibs were in heavy rotation, and within months started to show wear from multiple washings each week. One day I was opining to my friend Michelle (also a recipient of Sally's bibs) how wonderful they were but that I just didn't have enough and she said, sympathetically, "They're really easy to make, you know." After some tips from Michelle, I was off on a few quick errands and within a day, I had expanded our bib wardrobe to one for each day of the week. I happen to be making some new ones for Audrey, so I'm sharing my bib wisdom with all.
You may scoff now, but if you've got a little one who uses bibs, put a Sally bib to the test. If you can't sew, find a friend or grandma who can and bribe her to make you a few. You won't be disappointed. Some people swear by those rubbery silicon bibs with the big pocket in front, but trust me, these are better: they absorb most spills, provide superior protection by completely covering a child's lap, and you don't have to wipe them down. Just throw them in the wash with your usual load of towels and you'll be ready to go for the next meal.
Materials and Preparation
You will need:
* about 2 yards of 1/2" double-fold bias seam binding (if you're new to sewing, I recommend buying it pre-packaged, but if you want to make your own you will need 1/3 of a yard of lightweight cotton fabric; either way, the binding must be cut on the bias so it will contour on the curves)
* thread to match seam binding
* terry cloth hand towel, dish towel, or larger towel or piece of terry cloth cut into a rectangle about 15" x 20" (you can afford to have an inch or two more in either direction but don't go any smaller or you will lose the great coverage Sally bibs are famous for)
* iron, ironing board, shears and sewing machine
If you are planning to make your own seam binding, I highly recommend using a rotary cutter, acrylic ruler and mat to keep your edges square and straight. I've made do with shears, a ruler and a straight edge, and marked lines on my fabric with a pencil, but it was a real pain. Before you get started, wash and dry your towels and seam binding fabric on the hottest cycle so they pre-shrink. Do not pre-wash any pre-packaged seam binding or it will lose its creases and start to unravel!
Step 1: Fold your pre-washed towel into quarters, smooth it out nice and flat, and round off the corners with your shears. Then unfold it by half and cut out a half-circle for the neck hole at the top.
Step 2: If you've purchased pre-packaged seam binding give yourself a pat on the back, eat some chocolate, take the rest of the afternoon off, and skip ahead to part 2, which I'll be posting tomorrow. If you're an overachiever like me and you want to have the cute contrast binding, stay put. Cut the fabric for your seam binding in 2-1/4" strips, on the bias. If you're new to sewing, "cut on the bias" means to cut at a 45-degree angle to the edge (or selvage) of the fabric.
If you're using a mat and rotary cutter, your mat will be marked with diagonal lines to show 45-degree angles for just such a purpose. You can also use a T-square and a straight-edge, and draw lines on the wrong side of your fabric to cut with your shears. Remember to cut on the bias or the binding will lay funny and not work correctly. When you're done you should have several long strips of fabric.
Step 3: Press your seam binding. Set your iron on the hottest setting, but turn off the steam so you don't burn your fingers while you're holding the fabric so closely. Fold and press each strip in half lengthwise (wrong sides together).
Then open it, and fold and press the bottom half down toward the center.
Do the same with the top half, folding and pressing it down toward the center.
Now, turn on your iron's steam, fold the binding in half, matching up the edges as exactly as possible, and press it flat and crisp.
When you finish ironing all your strips of fabric, turn off the iron (because sometimes I forget!), set everything aside, give yourself a pat on the back, and eat some chocolate. Check back tomorrow for part 2.
Back when Jimmy was born my friend Sally gave me a set of three marvelous homemade bibs. She was famous among the new moms at our church for her bibs. They were always bright colored terry cloth with complementary seam binding in fun, matching prints. Jimmy's three bibs were in heavy rotation, and within months started to show wear from multiple washings each week. One day I was opining to my friend Michelle (also a recipient of Sally's bibs) how wonderful they were but that I just didn't have enough and she said, sympathetically, "They're really easy to make, you know." After some tips from Michelle, I was off on a few quick errands and within a day, I had expanded our bib wardrobe to one for each day of the week. I happen to be making some new ones for Audrey, so I'm sharing my bib wisdom with all.
You may scoff now, but if you've got a little one who uses bibs, put a Sally bib to the test. If you can't sew, find a friend or grandma who can and bribe her to make you a few. You won't be disappointed. Some people swear by those rubbery silicon bibs with the big pocket in front, but trust me, these are better: they absorb most spills, provide superior protection by completely covering a child's lap, and you don't have to wipe them down. Just throw them in the wash with your usual load of towels and you'll be ready to go for the next meal.
Materials and Preparation
You will need:* about 2 yards of 1/2" double-fold bias seam binding (if you're new to sewing, I recommend buying it pre-packaged, but if you want to make your own you will need 1/3 of a yard of lightweight cotton fabric; either way, the binding must be cut on the bias so it will contour on the curves)
* thread to match seam binding
* terry cloth hand towel, dish towel, or larger towel or piece of terry cloth cut into a rectangle about 15" x 20" (you can afford to have an inch or two more in either direction but don't go any smaller or you will lose the great coverage Sally bibs are famous for)
* iron, ironing board, shears and sewing machine
If you are planning to make your own seam binding, I highly recommend using a rotary cutter, acrylic ruler and mat to keep your edges square and straight. I've made do with shears, a ruler and a straight edge, and marked lines on my fabric with a pencil, but it was a real pain. Before you get started, wash and dry your towels and seam binding fabric on the hottest cycle so they pre-shrink. Do not pre-wash any pre-packaged seam binding or it will lose its creases and start to unravel!
Step 1: Fold your pre-washed towel into quarters, smooth it out nice and flat, and round off the corners with your shears. Then unfold it by half and cut out a half-circle for the neck hole at the top.
Step 2: If you've purchased pre-packaged seam binding give yourself a pat on the back, eat some chocolate, take the rest of the afternoon off, and skip ahead to part 2, which I'll be posting tomorrow. If you're an overachiever like me and you want to have the cute contrast binding, stay put. Cut the fabric for your seam binding in 2-1/4" strips, on the bias. If you're new to sewing, "cut on the bias" means to cut at a 45-degree angle to the edge (or selvage) of the fabric.If you're using a mat and rotary cutter, your mat will be marked with diagonal lines to show 45-degree angles for just such a purpose. You can also use a T-square and a straight-edge, and draw lines on the wrong side of your fabric to cut with your shears. Remember to cut on the bias or the binding will lay funny and not work correctly. When you're done you should have several long strips of fabric.
Step 3: Press your seam binding. Set your iron on the hottest setting, but turn off the steam so you don't burn your fingers while you're holding the fabric so closely. Fold and press each strip in half lengthwise (wrong sides together).
Then open it, and fold and press the bottom half down toward the center.
Do the same with the top half, folding and pressing it down toward the center.
Now, turn on your iron's steam, fold the binding in half, matching up the edges as exactly as possible, and press it flat and crisp.When you finish ironing all your strips of fabric, turn off the iron (because sometimes I forget!), set everything aside, give yourself a pat on the back, and eat some chocolate. Check back tomorrow for part 2.
Monday, June 09, 2008
Whirlwind weekend
Last Friday morning Audrey and I headed over the pass, abandoning the boys to a weekend of Wii and fishing. I don't think they missed us. Much. First stop: I dropped Gertie off at the Singer service center in Bellevue for a much-needed tune-up. Five pairs of Jimmy's winter pants had holes in the knees, so (tightwad that I am) I cut them all off and hemmed them into shorts. I've also made some shorts for myself and a gorgeous new Mexican oil cloth tablecloth, so with all those heavy-duty fabrics, I've been wearing Gertie out over the past few weeks and her thread tension was starting to get funky. Let me just say, if you live in Washington and have a Singer sewing machine, the service center is a great place to go for service and repairs, even if you have to make a trip to get there, like I did. A complete service costs only $89, which includes any mechanical parts that need to be replaced (electrical parts, like my lightbulb that burned out, are a little extra). That's a bargain for Singer factory parts and Mel, the repairman, is a pro and all-around nice guy. He gives great advice, completely free of charge, and had my machine ready for me to pick up in just two hours.
Next stop: Audrey and I had lunch and a visit with Lydia and her girls at their new digs in Kirkland. Far too short of a visit, but it was thoroughly enjoyable. After picking up Gertie from the service center, I went to Redmond to exchange some biking shoes I ordered online that turned out to be too small, then headed back to Bellevue for a visit with Faye (also wonderful, way overdue, and not nearly long enough), before heading to Everett.
Ramona, the youngest of my four original siblings, lives in Everett with her husband Jason and her little girl Aidan, who is a year older than Audrey. Ramona just graduated with her associate degree from ECC and has already been accepted to the UW history program. (I will demonstrate great restraint and refrain from making the obligatory plug for my alma mater and field of study. Uh, too late.) Dory was also there with her youngest, Gavin, and it was a wonderful time for us to support Ramona in her tremendous accomplishment, as well as strengthening our bonds as sisters. The photo above is us hamming it up (Ramona, Dory and me, from left to right). We stayed up way past our bedtime on Friday night (make that Saturday morning; I lost track after 3 a.m.) talking and enjoying the chance to get caught up on each other's lives. The babies had fun playing together, too.
On Saturday afternoon, I headed down to Seattle for a soggy but memorable picnic with Holly, Kim, Dean and their families. I've known Holly and Kim since junior high, and we all worked together with Dean on our high school paper. It was a treat to see them (especially since Holly lives in Munich and rarely makes it to the States). Everyone looked the same and yet older, in a good, dignified way that comes from laugh lines and gray hair: being happier yet sadder and therefore wiser. After the picnic, Audrey and I turned back and headed home, arriving just in time to give Jimmy kisses goodnight before he went to bed. It was nice to have a change of scene, especially to the vivid green of my hometown, but it sure is good to be home...
Subscribe to:
Posts (Atom)